Have you been wanting to try polymer clay crafts but feel intimidated by all the stunning creations you see online? Maybe you’re worried that you’ll ruin the clay, need expensive tools, or simply aren’t creative enough to make something beautiful.
I completely understand because I felt the exact same way when I first bought my pack of polymer clay. It sat untouched in my craft drawer for weeks because I convinced myself that only professional artists could make those gorgeous earrings and miniature decorations. I was afraid I’d waste the clay before making anything worth keeping.
One rainy afternoon, I finally decided to give it a try with a simple keychain. It wasn’t perfect, but I loved the process so much that I couldn’t wait to make another project. Before long, I was experimenting with colors, textures, and different designs. That little keychain gave me the confidence to keep creating, and today DIY polymer clay crafts have become one of my favorite relaxing hobbies.
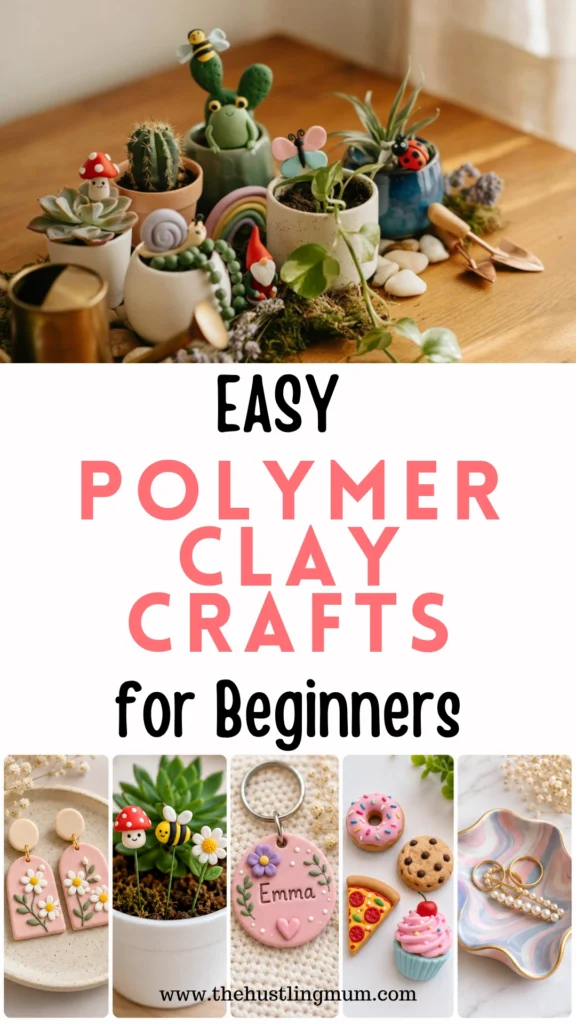
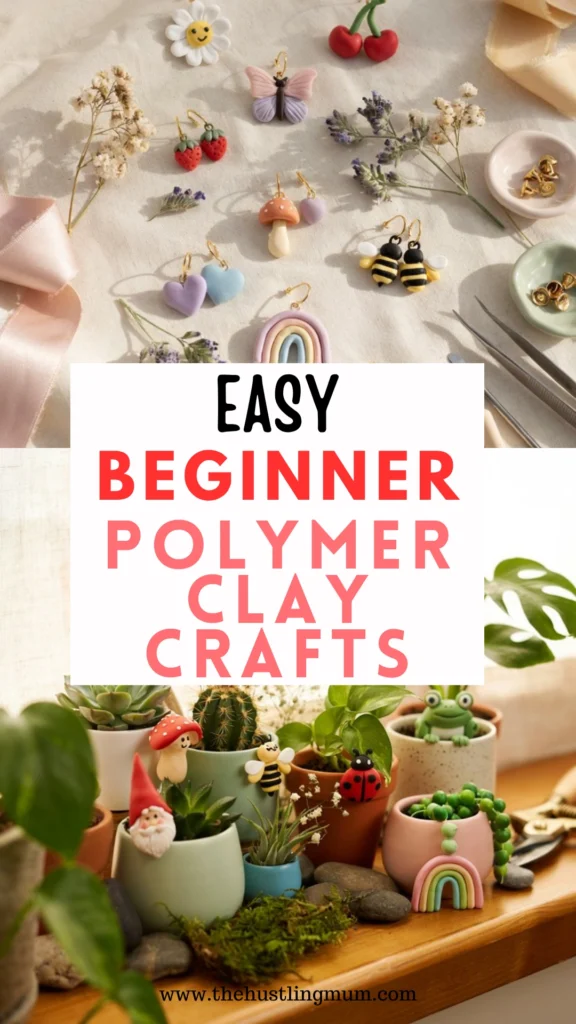
The wonderful thing about polymer clay is that you don’t need years of experience to create something beautiful. With a little patience and a few easy techniques, you’ll be surprised at what you can make. In this guide, I’m sharing my favorite easy polymer clay crafts and polymer clay crafts for beginners, complete with step-by-step instructions so you can confidently start creating today.
If you love crafting, you might also enjoy these beginner-friendly ideas:
- Easy air-dry clay craft ideas.
- DIY fabric scrap crafts that are perfect for selling.
- Creative Easter craft ideas.
- Profitable crafts to sell from home.
- Creative handmade crochet projects.
- Easy fall craft ideas.
- Beginner-friendly sewing craft ideas.
- Valentine wood crafts.
- Easy button crafts to make and sell.
Polymer Clay Craft Ideas
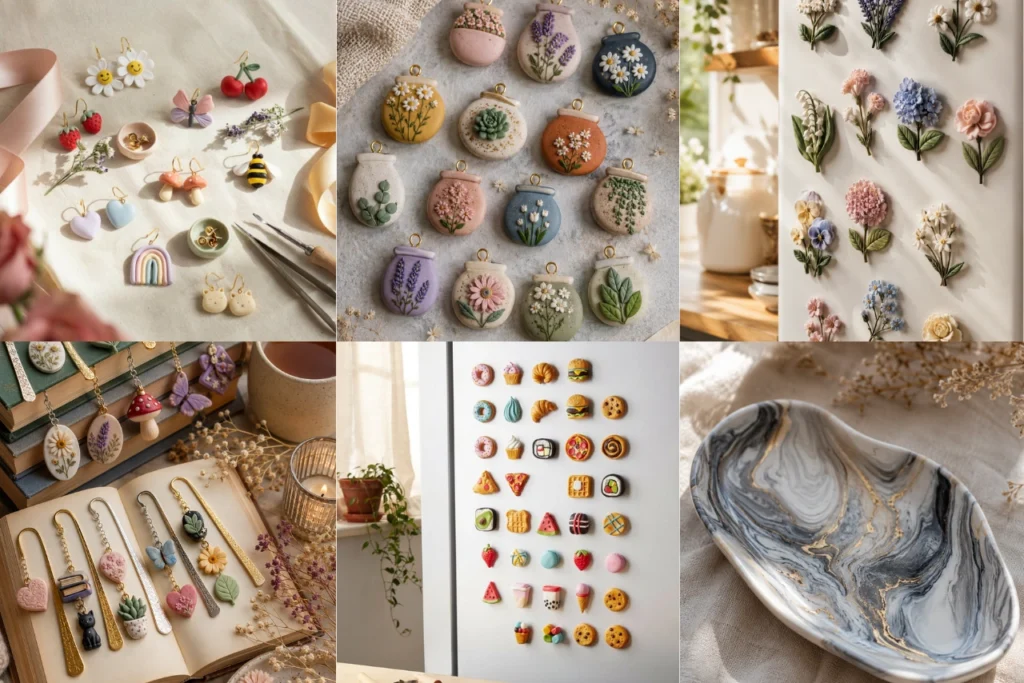
1. Cute Polymer Clay Earrings
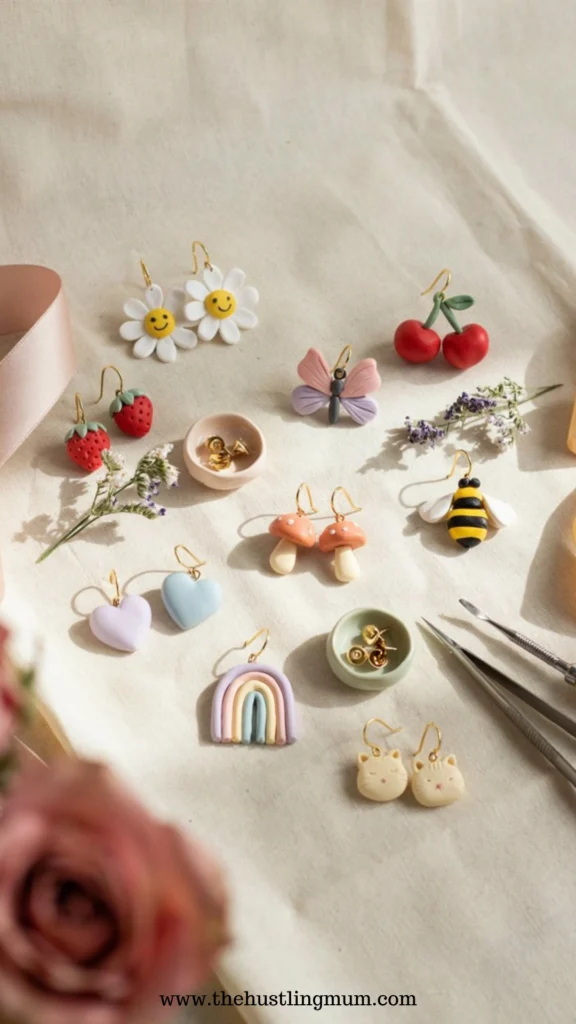
One of the most popular polymer clay crafts is handmade earrings. They’re stylish, lightweight, and surprisingly simple to make. You can create modern geometric designs, floral earrings, rainbow arches, or even fun fruit-inspired styles.
Start by conditioning your clay. Knead it with your hands until it becomes soft and flexible. This step prevents cracking after baking.
Roll the clay into an even sheet using an acrylic roller or a smooth glass jar. Aim for about ⅛-inch thickness. Use cookie cutters or clay cutters to cut out circles, arches, ovals, or other shapes.
If you’d like to create marbled earrings, gently twist two clay colors together before rolling them flat. Avoid overmixing so the marble effect stays visible.
Use a toothpick or needle tool to make small holes where the jump rings will go. Remember to do this before baking.
Bake the pieces according to the package instructions, then let them cool completely. Sand any rough edges with fine-grit sandpaper if needed. Finally, attach jump rings and earring hooks using jewelry pliers.
These earrings also make wonderful handmade gifts and are popular products if you’re looking for profitable crafts to sell from home.
You may also liek to read:
2. Decorative Plant Pot Charms
If you’re a plant lover, these adorable charms will instantly brighten up your indoor garden.
Choose fun designs like mushrooms, tiny bees, butterflies, flowers, snails, ladybugs, or little smiling suns.
Begin by rolling small pieces of clay into basic shapes like balls, teardrops, or cylinders. Build your design one piece at a time, gently pressing each section together.
For example, a mushroom can be made using a small white cylinder for the stem and a rounded red cap decorated with tiny white dots.
Insert a floral wire or sturdy craft wire into the bottom before baking. Once baked and cooled, simply place the charm into your favorite flower pot.
Try creating a collection with different themes so each plant has its own personality.
3. Personalized Name Keychains
Personalized keychains are fun to make and always feel thoughtful because they’re customized for someone special.
Roll your clay into a flat sheet and cut out circles, rectangles, hearts, or tag shapes.
Use alphabet stamps or a toothpick to add names, initials, or short words like “Smile,” “Dream,” or “Happy.”
Decorate around the lettering with tiny flowers, stars, hearts, leaves, or miniature fruit slices.
Before baking, make a hole near the top using a straw or skewer.
After baking and cooling, attach a keyring using a jump ring.
These keychains are perfect birthday gifts, teacher appreciation gifts, stocking stuffers, or small products to sell at craft fairs.
4. Mini Food Magnets
Tiny food sculptures are some of the cutest DIY polymer clay crafts you can make.
Choose your favorite treats such as donuts, cupcakes, macarons, strawberries, pizza slices, sushi, cookies, waffles, or ice cream cones.
Start with simple shapes. A donut begins as a small ball that is gently flattened before making a hole in the center.
Add icing by placing a thin layer of another clay color over the donut. Create sprinkles using tiny rolled pieces of colorful clay.
Bake each piece according to the instructions.
After cooling, glue a strong magnet onto the back using industrial-strength craft glue.
Arrange several different foods together on your refrigerator for an adorable kitchen decoration.
5. Marbled Trinket Dish
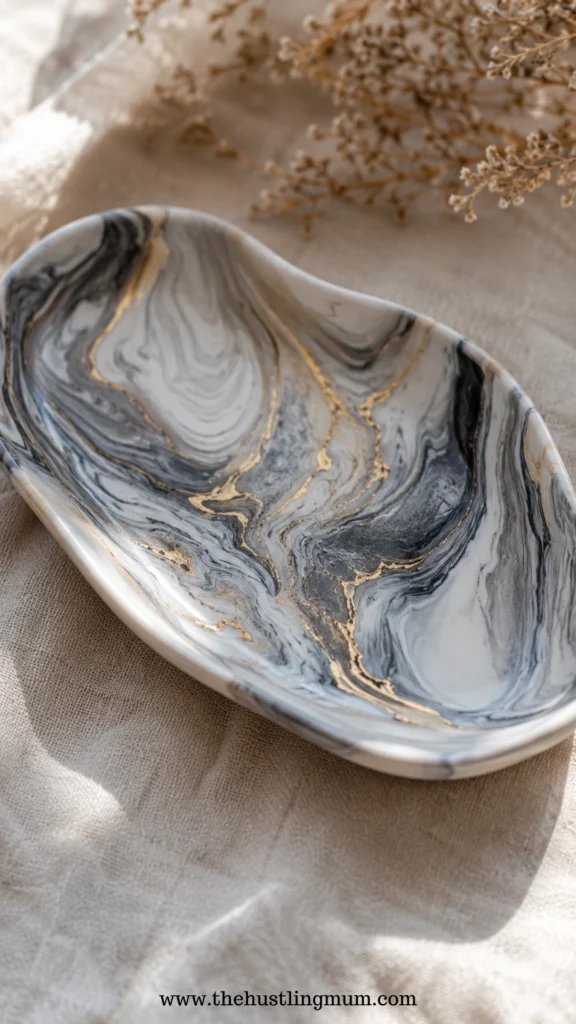
This elegant project looks much more complicated than it actually is.
Choose two or three coordinating clay colors such as white, blush pink, sage green, navy, or black.
Roll each color into long ropes and twist them together. Fold them a few times without fully blending the colors.
Roll the clay flat until you see beautiful marble patterns throughout.
Cut a large circle using a bowl or round cutter.
Place the clay circle into an oven-safe bowl to create the curved dish shape.
Bake according to the manufacturer’s directions.
Once cooled, you can leave it matte or apply a glossy glaze if desired.
These little dishes are perfect for holding rings, earrings, coins, or hair clips on your bedside table.
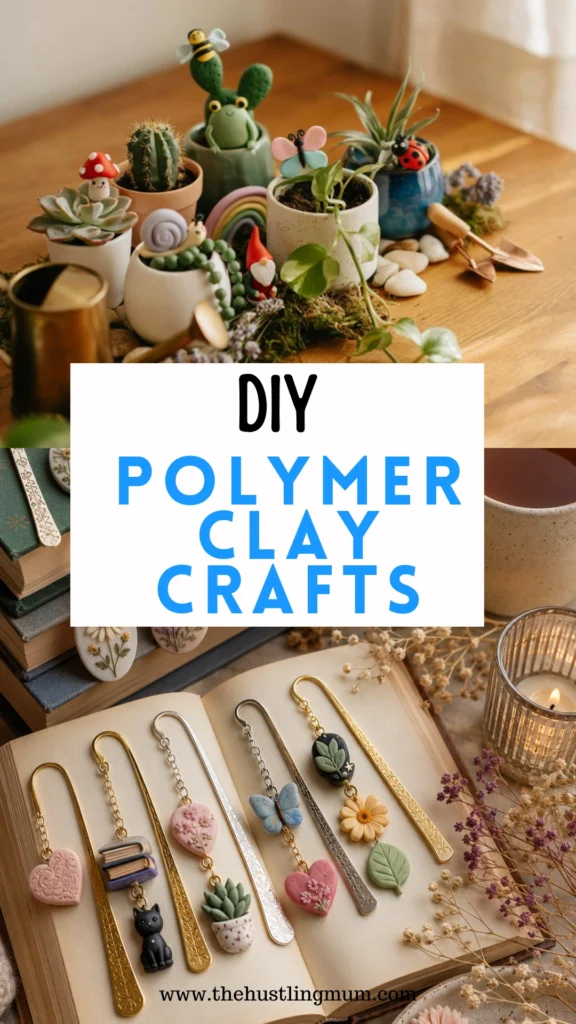
6. Clay Bookmark Charms
If you love reading, this project combines creativity with practicality.
Purchase plain metal bookmarks from a craft store or online.
Create tiny clay charms such as books, flowers, butterflies, moons, stars, feathers, or hearts.
Keep the charms fairly small so they don’t become too heavy while reading.
Before baking, insert a small eye pin into the top of each charm.
Bake and allow them to cool completely.
Attach the charm to the bookmark using a jump ring.
You can even personalize bookmarks with initials or favorite colors, making them thoughtful gifts for teachers, students, or book-loving friends.
7. Floral Refrigerator Magnets
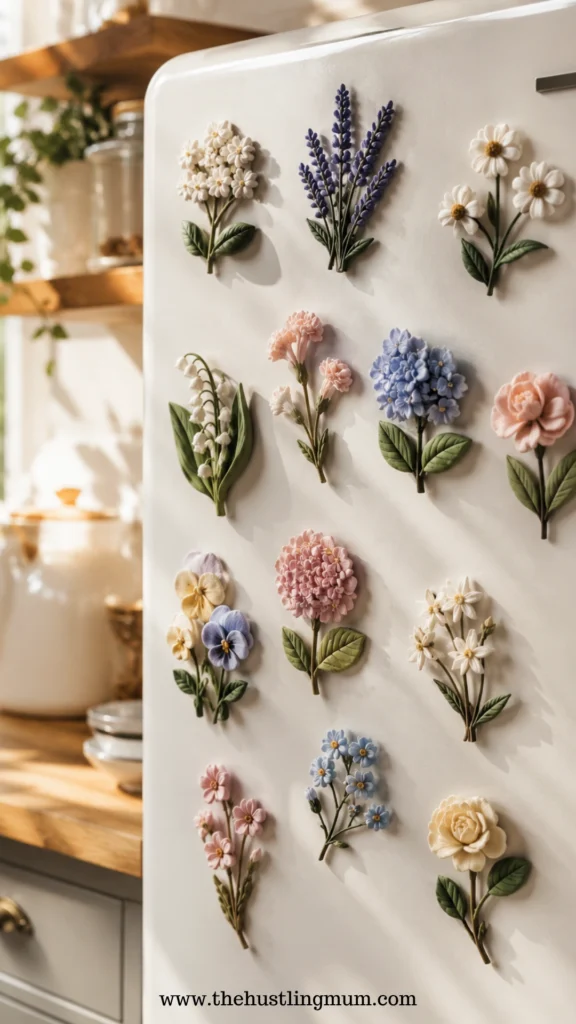
Bright floral magnets instantly make your kitchen feel cheerful.
Choose flowers that are easy to shape, such as daisies, tulips, roses, lavender, or sunflowers.
Roll tiny balls of clay and flatten them into petals.
Arrange the petals around a contrasting center to form the flower.
Add leaves by rolling green clay into teardrop shapes and gently drawing leaf veins with a needle tool.
Once satisfied with your arrangement, bake everything carefully.
After cooling, glue magnets to the back.
Create an entire garden of colorful flowers using different color combinations throughout the year.
8. Christmas Ornament Decorations
Holiday ornaments are some of the most rewarding easy polymer clay crafts because they can become treasured family keepsakes.
Roll your clay evenly and use holiday cookie cutters to cut stars, snowflakes, Christmas trees, gingerbread people, candy canes, or ornaments.
Press lace, leaves, textured fabric, or stamps into the clay to create beautiful patterns before baking.
Don’t forget to make a hole near the top for hanging ribbon or twine.
Bake according to the package instructions.
Once cooled, you can leave them as they are or decorate them further using acrylic paint, metallic markers, glitter accents, or gold leaf.
Write the year on the back before baking to create a keepsake you’ll enjoy bringing out every holiday season.
9. Polymer Clay Coasters
If you’re looking for DIY polymer clay crafts that are both beautiful and useful, handmade coasters are a fantastic project. They’re stylish enough to decorate your coffee table and also make thoughtful housewarming or birthday gifts.
Start by conditioning your clay until it’s soft and easy to work with. Roll it into a slab that’s about ¼ inch thick. Keeping the clay slightly thicker helps the coaster stay sturdy after baking.
Choose your favorite design. A marbled pattern is always popular and easy to create. Simply twist two or three clay colors together, fold them a few times, and gently roll them flat without completely blending the colors.
Use a round bowl, coaster, or cookie cutter as a guide to cut even circles. You can also make hexagon or square coasters if you prefer a modern look.
Smooth the edges with your fingers before baking according to the package directions. Once the coasters have cooled completely, lightly sand any rough spots for a polished finish.
If you’d like extra protection, apply a clear clay-safe varnish after baking. Pair a few matching coasters together with ribbon, and you have a beautiful handmade gift set.
10. Cute Animal Figurines
Tiny animal figurines are some of the most enjoyable polymer clay crafts for beginners because they help you practice shaping basic forms while creating something adorable.
Start with simple animals like bears, cats, bunnies, turtles, penguins, or foxes. Don’t worry about making them look realistic. Cute, cartoon-style animals are often easier and just as charming.
Begin by making the body using a large ball or oval shape. Next, roll a slightly smaller ball for the head and gently press it onto the body. Blend the connection with your fingers or a clay tool so it stays secure.
Create ears, paws, tails, and other small features using tiny pieces of clay. A toothpick works well for adding eyes, whiskers, fur texture, or tiny smiles.
Bake the figurines according to the instructions and let them cool completely before handling them.
Display your finished animals on shelves, use them in fairy gardens, or turn them into cake toppers, magnets, or desk decorations.
11. Floral Hair Clips
Handmade floral hair clips are elegant accessories that are surprisingly easy to make. They also sell well at local craft fairs and online shops.
Start by choosing flowers that are beginner-friendly, such as daisies, roses, cherry blossoms, or sunflowers.
Roll tiny balls of colored clay and flatten them into petals. Arrange the petals around a contrasting center until you’re happy with the flower.
You can also add tiny leaves or little berries to create a fuller design. If you enjoy seasonal crafting, use autumn leaves for fall or pastel flowers for spring.
Bake the flowers according to the package directions.
After they’ve cooled, use strong jewelry glue to attach them to plain metal hair clips or barrettes.
Allow the glue to dry completely before wearing them.
These handmade accessories look beautiful with both casual outfits and special occasion hairstyles.
12. Clay Bead Bracelets
Colorful bracelets are among the easiest polymer clay crafts for beginners, making them perfect if you’re just learning how to work with clay.
Begin by rolling small balls of clay that are roughly the same size. Keeping them uniform will make your bracelet look more professional.
If you’d like a fun design, mix bright colors together for a playful look or choose soft neutral shades for something more elegant.
Use a toothpick or skewer to carefully poke a hole through the center of each bead before baking. Make sure the holes are large enough for your elastic cord.
Bake the beads according to the manufacturer’s instructions.
Once they’ve cooled, thread them onto elastic jewelry cord. You can alternate clay beads with wooden beads, pearls, or gold spacer beads to create different styles.
Tie the elastic securely with a double knot and trim the excess cord.
These bracelets are fun to stack, easy to personalize, and make lovely handmade gifts.
13. Personalized Gift Tags
If you enjoy wrapping gifts, these reusable clay gift tags add a beautiful handmade touch that recipients can keep long after the present has been opened.
Roll your clay into a thin, even sheet and cut out gift tag shapes using a knife or cookie cutter.
Stamp names, initials, short greetings, or holiday messages into the clay before baking.
Decorate each tag with tiny flowers, hearts, stars, leaves, or delicate borders.
Use a straw or skewer to create a ribbon hole near the top.
Bake the tags and allow them to cool completely.
Thread ribbon, twine, or velvet cord through the hole and tie them onto gift bags or wrapped presents.
These personalized tags are perfect for birthdays, weddings, baby showers, Christmas gifts, or party favors.
14. Decorative Picture Frame Embellishments
Transform a plain wooden picture frame into a unique keepsake by decorating it with handmade clay embellishments.
Choose a theme before you begin. Floral vines, butterflies, woodland animals, seashells, hearts, or seasonal leaves all work beautifully.
Create each decorative piece separately using small amounts of clay. Arrange everything on the frame before baking to make sure you’re happy with the design.
Bake each clay piece individually according to the instructions.
Once cooled, attach them to the frame using strong craft glue.
If you’re using an unfinished wooden frame, consider painting it first to match your clay colors.
These custom frames make meaningful gifts for weddings, anniversaries, baby photos, or family memories.
15. Mini Succulent Sculptures
Mini succulents are one of my favorite easy polymer clay crafts because they look realistic, require very little clay, and never need watering.
Choose soft shades of green, blue-green, sage, or dusty pink for a natural appearance.
Roll small teardrop-shaped pieces for each leaf. Start with a tiny center bud, then gently layer additional leaves around it.
Continue adding rows of leaves until the succulent reaches your desired size.
Take your time arranging the leaves because this is what gives the plant its realistic appearance.
Bake according to the package instructions.
Once cooled, place your finished succulent inside a tiny terracotta pot, miniature teacup, or decorative planter. You can even add small pebbles around the base to make it look more realistic.
These little plants look adorable on office desks, bookshelves, tiered trays, or windowsills, and they also make charming handmade gifts.
If you enjoy working with clay, don’t miss these Easy air-dry clay craft ideas for even more beginner-friendly projects.
Final Tips for Working with Polymer Clay
Before you begin your first project, keep these simple tips in mind:
- Always knead your clay before using it to prevent cracks.
- Work on a clean, smooth surface to keep lint and dust out of the clay.
- Wash your hands between changing colors to avoid unwanted smudges.
- Follow the baking temperature recommended by the clay manufacturer.
- Let your projects cool completely before handling them.
- Store unused clay in airtight bags or containers to keep it soft.
Remember, your first project doesn’t have to be perfect. Every piece you make teaches you a new technique, and with practice, your confidence and skills will continue to grow.
Final Word
I hope these polymer clay crafts have inspired you to pull out some clay and start creating. One of the things I love most about polymer clay is that there’s no right or wrong way to be creative. Every project reflects your own style, and even the little imperfections often become your favorite part of the finished piece.
If you’re completely new to crafting, start with one of the simpler projects like the personalized keychains, bead bracelets, or floral magnets. As you become more comfortable working with clay, you’ll naturally feel ready to try more detailed creations like figurines or marbled trinket dishes.
The most important thing is to enjoy the process. Put on your favorite playlist or podcast, grab a few colors of clay, and spend some time creating something with your hands. You might be surprised at how relaxing and rewarding it feels.
If you found this post helpful, don’t forget to pin it and share it with your friends.
Related Posts:
- Easy air-dry clay craft ideas.
- DIY fabric crafts that are perfect for selling.
- Creative Easter craft ideas.
- Profitable crafts to sell from home.
- Easy seashell crafts.

I am a passionate blogger who loves sharing insights on blogging tips, Pinterest strategies, and making money online. With a knack for simplifying complex concepts, I help readers grow their online presence and achieve their Pinterest marketing goals. Follow along for practical advice and proven tactics to elevate your blog, Pinterest and online business.